Friday, October 8, 2010

JSP update query using JDBC

JSP- update statement

Introduction:

Sometimes we want to change the inserted data into the database.
If you want to update the student_name in our exam table, you’ll use a SQL statement like the one below:

mysql > update exam set student_name=’suresh’ where student_name=’sureshkumar’;


Problem:

Update data in mysql database.

We have to change student_name as kannanto kamalkannan.

Procedure:

Already How to import mysql-connector.jar and how to create database and how to create table and how to insert data into the table and how to select the inserted data in exam table.

Step 1:

Use update SQL statement to update data in our exam table.

We use update SQL statement to update data in mysql


Step 2:

Create jsp file I have used file name as updatePro.

Include following coding into updatePro

< %@page contentType="text/html" pageEncoding="UTF-8"% >
< !DOCTYPE HTML PUBLIC "-//W3C//DTD HTML 4.01 Transitional//EN"
http://www.w3.org/TR/html4/loose.dtd >
< %@page import="java.sql.*" % >
< html >
< head >
< title > Java DataBase Connectivity Example-Update Query < /title >
< /head >
< body >
< %!
Connection con=null;
ResultSet rs=null;
Statement stmt=null;
% >
< %
try
{
Class.forName("com.mysql.jdbc.Driver");
}
catch(Exception e)
{
out.println(e.getMessage());
}
try
{
con=DriverManager.getConnection("jdbc:mysql://localhost/example","root","sure");
stmt=con.createStatement();
int i=stmt.executeUpdate("update exam set student_name='kamalkannan' where student_name='kannan'");
if(i==1)
{
out.println("Successfully Updated");
}
else
{
out.println("Error For Updated");
}
}

catch(Exception e)
{
out.println(e.getMessage());
}
finally
{
con.close();
stmt.close();
}
% >
< /body >
< /html >

Step 3:


Step 4:

            We want to check the data is updated successfully.


JSP select query using JDBC


JSP- Select Query.

Problem:

              Using Select Query, to retrieve the data from table using jsp and mysql.
             We follow some steps to connect jsp with mysql database.

1). Load the Driver

            Class.forName(“com.mysql.jdbc.Driver”);

            This statement load the mysql Driver.

2). Create the Connection

 String s=”jdbc:mysql://localhost/Database_Name”,”username”,”password”
           
Connection con=DriverManager.getConnection(s);

3). Create Statement

            Statement stmt=con.createStatement();

            String sql=”select * from Table_Name”;

            Stmt.executeQuery(sql);

Requirements:

            Netbean 6.8

            Mysql 6.0

            Knowledge from mysql.


Procedure:

             Step 1:
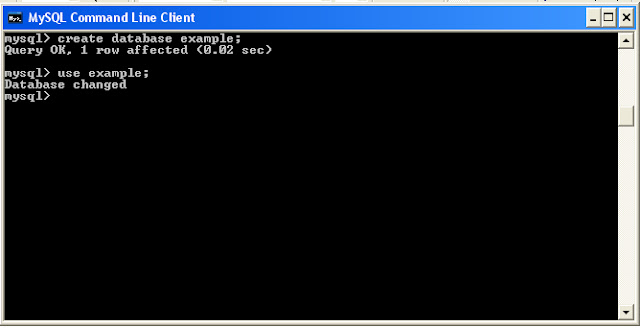
                        Create DataBase named as example.

            How to Create Database


Mysql > create database example;


Successfully database is created.

Step 2:

Use database.

How to activate example database?

Mysql > use example;


Step 3:

create table named exam.

Mysql > create table exam(student_name varchar(40),rollno varchar(20));


Step 4:

Insert data into exam table in example database.

Mysql > insert into exam values(‘anbuselvan’,’2k2ccs2006’);


Step 5:

Create jsp file using netbean IDE.

Give any file name for jsp. I have given jsp file name as databaseExam.jsp

Already I have explained How to create jsp file using netbean 6.8. if you forget the procedure. Please remind the previous post and you will continue this post.

Next

Include following coding into databaseExam.jsp

< %@page contentType="text/html" pageEncoding="UTF-8"% >
< !DOCTYPE HTML PUBLIC "-//W3C//DTD HTML 4.01 Transitional//EN"
http://www.w3.org/TR/html4/loose.dtd >
< %@page import="java.sql.*" % >
< html >
< head >
                   < title > Java DataBase Connectivity Example For Select < /title >
< /head >
< body >
< %!
             Connection con=null;
             ResultSet rs=null;
             Statement stmt=null;
% >
< %
try
{
               Class.forName("com.mysql.jdbc.Driver");
}
catch(Exception e)
{
              out.println(e.getMessage());
}
try
{
             con=DriverManager.getConnection("jdbc:mysql://localhost/example","root","sure");
             stmt=con.createStatement();
             rs=stmt.executeQuery("select * from exam");

           while(rs.next())
           {

                 out.println(rs.getString(1));
                out.println(rs.getString(2)) ;
          }

}
catch(Exception e)
{
               out.println(e.getMessage());
}
% >
< /body >
< /html >

You will run the databaseExam.jsp

Step 4:

Note:
          Already I have explained how to include mysql-connector.jar in our project. 


          Run the Application

You will get the output

Thursday, October 7, 2010

JSP Insert Query using JDBC


JSP- Insert Query.

Problem:

              Using insert Query, to insert the data to table using jsp and mysql.

  We follow some steps to connect jsp with mysql database.


1). Load the Driver

            Class.forName(“com.mysql.jdbc.Driver”);

            This statement load the mysql Driver.

2). Create the Connection

String s=”jdbc:mysql://localhost/Database_Name”,”username”,”password”
           
Connection con=DriverManager.getConnection(s);

3). Create Statement

            Statement stmt=con.createStatement();

            String sql=”insert into table_name values(‘suresh’,’kumar’);

Stmt.executeUpdate(sql);

Requirements:

            Netbean 6.8

            Mysql 6.0

            Knowledge from mysql.
 
Procedure:
                         Open mysql 6.0

             Step 1:
                        
                        Create DataBase named as example.

How to Create Database

Mysql > create database example;


Successfully database is created.

Step 2:

                Use database.

How to activate example database?

Mysql > use example;


Step 3:

create table named exam.

Mysql > create table exam(student_name varchar(40),rollno varchar(20));


Step 4:

Create jsp file name as InsertExample

Include following coding into InsertExample


< %@page contentType="text/html" pageEncoding="UTF-8"% >
< !DOCTYPE HTML PUBLIC "-//W3C//DTD HTML 4.01 Transitional//EN"
http://www.w3.org/TR/html4/loose.dtd >
< %@page import="java.sql.*" % >
< html >
< head >
< title > Java DataBase Connectivity-Insert Example < /title >
< /head >
< body >
< %!
Connection con=null;
ResultSet rs=null;
Statement stmt=null;
% >
< %
try
{
Class.forName("com.mysql.jdbc.Driver");
}
catch(Exception e)
{
out.println(e.getMessage());
}
try
{
con=DriverManager.getConnection("jdbc:mysql://localhost/example","root","sure");
stmt=con.createStatement();
int i=stmt.executeUpdate("insert into exam values('sureshkumar','2k2ccs37')");
if(i==1)
{
out.println("Successfully Inserted");
}
else
{
out.println("Error For Inserted");
}
}

catch(Exception e)
{
out.println(e.getMessage());
}
finally
{
con.close();
stmt.close();
}
% >
< /body >
< /html >


Step 5:

           
             Download mysql-connector-java-5.1.6-bin.jar;

            Extract mysql-connector-java-5.1.6-bin.jar  zip file.

            Import mysql-connector-java-5.1.6-bin.jar  to our project.

            If don’t import mysql-connector-java-5.1.6-bin.jar , you’ll get error.

            How to import mysql-connector-java-5.1.6-bin.jar file

            Right Click on DataBasePro and select properties.


            Project Properties-DataBasePro window will open.


             Select Libraries under categories


Click Add JAR/Folder


Select mysql-connector.jar that you have installed in your system and open.
            
Step 6:

            Run the InsertExample


Get Output


Step 7:

How to check that the record is inserted into exam table in mysql database.

Open mysql 6.0

To activate our database.

Using following command

mysql > use database_name;

mysql > use example;

mysql > select * from exam;


Note we insert sureshkumar as student_name and 2k2ccs37 as rollno


That’s all.

You have any doubt, post comments.

Have a nice day.

JSP Error Handling in jsp


Jsp- Error Handling in jsp


Introduction:
                        There are two types of error that occur during lifecycle of a jsp.

            1). Translation time errors

            2). Request time errors


  • Translation time errors: occurs during the initial request
  • Request time errors- occurs during the subsequent request


Translation Time Errors:

            These errors occur when the jsp page is requested first and the jsp source file is translated into the servlet file. These errors are compilation failure errors. These types of error are reported to the client with error status code 500 or server Error. The all syntax error are called as Translation Time Errors.

TranslationError.jsp


< %@page contentType="text/html" pageEncoding="UTF-8"% >
< !DOCTYPE HTML PUBLIC "-//W3C//DTD HTML 4.01 Transitional//EN"
http://www.w3.org/TR/html4/loose.dtd >

< html >
< head >

< title > JSP Error Page < /title >

< /head >
< body >
< h1 > Hello World! < /h1 >
< %
out.println("Welcome to JSP");
% >

< /body >
< /html >


jsp- request time error

            This type of error occurs during the request time. In request time error, the jsp source file is translated into the servlet file. But it will not produce any result. It will show error. This is known as run time error.


The exception that are not handled will be forwarded to the error page as specified in the jsp < @ page errorPage=”jsp” >

Step 1:
Creating Error Page

We have to create jsp and inform the jsp engine that the page is jsp error page.

How to inform to the jsp engine?

We include isErrorPage=”true” in < @ page isErrorPage=”true” > tag

ErrorPage.jsp

< %@page contentType="text/html" pageEncoding="UTF-8"% >
< %@page isErrorPage="true" import="java.io.*" % >
< !DOCTYPE HTML PUBLIC "-//W3C//DTD HTML 4.01 Transitional//EN"
http://www.w3.org/TR/html4/loose.dtd >

< html >
< head >
< title > JSP Error Page < /title >
< /head >
< body >
< %=

exception.getMessage()

% >
< /body >
< /html >


ErrorJsp.jsp

< %@page contentType="text/html" pageEncoding="UTF-8"% >
< %@page errorPage="ErrorPage.jsp" % >
< !DOCTYPE HTML PUBLIC "-//W3C//DTD HTML 4.01 Transitional//EN"
http://www.w3.org/TR/html4/loose.dtd >

< html >
< head >
< title > JSP throw uncaught Exception < /title >
< /head >
< body >
< %!
int a=5,b=0,c;
% >
< %
c=a/b;
out.println(c);
% >
< /body >
< /html >

Wednesday, October 6, 2010

JSP using netbean6.8 IDE to create jsp file


Jsp- java server pages-using netbean6.8

Introduction:

IDE – Integrated Development Environment. It is very useful to create web application.
Now a days most of the company use IDE to develop web application.we use netbean 6.8 IDE to create web application.
 
Download netbean 6.8:

                        1). Download netbean 6.8

                        2). Install netbean 6.8
                                              
Using netbean 6.8:

Step 1:

            Open NetBeans IDE 6.8


Step 2:

            Create web project

            I have given the project name as 


  New Project window will open


Under categories select Java Web and right side we select Web Application under projects.

Next

New Web Application window will open

Where we give project name JspProject


Next

New web Application window will open.

Where we select server as Apache Tomcat 6.0.20


Next


Finish

We create project successfully.

Step 3:

               Create folder for jsp


We give folder name as jsp


Finish

Step 4:

            Create jsp file


We give jsp file name as home.jsp


Finish

home.jsp

< %@page contentType="text/html" pageEncoding="UTF-8"% >
< !DOCTYPE HTML PUBLIC "-//W3C//DTD HTML 4.01 Transitional//EN"
http://www.w3.org/TR/html4/loose.dtd >

< html >
< head >
< title > JSP Page < /title >
< /head >
< body >
< h1 > Hello World! < /h1 >
< /body >
< /html >

Step 5:

Run the jsp application


Right click on home.jsp


Output 


Tuesday, October 5, 2010

JSP Using jsp Scriptlet


Jsp-Scriptlet

A scriptlet is a set of java statement embedded in an HTML page. The statements are distinguished from their surrounding HTML by being placed between &lt % and % & gt

We can include java coding between scriptlet.

Syntax:


JSP Using jsp Scriptlet


Jsp-Scriptlet

A scriptlet is a set of java statement embedded in an HTML page. The statements are distinguished from their surrounding HTML by being placed between &lt % and % & gt

We can include java coding between scriptlet.

Syntax:


< statement; >


Example for Scriptlet:


Aim:

Get system hour:minute:seconds


< %@page contentType="text/html" pageEncoding="UTF-8"% >

< %@page import="java.util.Date" % >

< !DOCTYPE HTML PUBLIC "-//W3C//DTD HTML 4.01 Transitional//EN"

http://www.w3.org/TR/html4/loose.dtd >


< html >

< head >


< title > Example for Scriptlet < /title >

< /head >

< body >

< %

Date d=new Date();


%>

< font size="20" >

< %= d.getHours() % > : < %= d.getMinutes() % > : < %= d.getSeconds() % >

< /font >

< /body >

< /html >

Output:


NOTE:
           Scriptlet is used to include java programming code. Scriptlet tag is alse used to declare variable.